![]()
Author: Noy Saycocie
Homepage: http://noysaycocie.tripod.com
Email: noysaycocie1@yahoo.com
Date created: 7/20/2003
Date finished: 7/22/2003
Objective:
This tutorial will show you how to customize your own Karaoke DVD. Organize your favorite Karaoke songs and burn them into a single DVD
Programs that I use:
 SmartRipper
2.41
SmartRipper
2.41
![]() DVD
Producer 3.5
DVD
Producer 3.5
![]() Photoshop 7.0
Photoshop 7.0
![]() Nero 6.0
Nero 6.0
Contents
A. Ripping Karaoke DVD with SmartRipper
B. Making DVD menu in Photoshop
C. Authoring DVD Karaoke
![]()
1. Insert your Karaoke DVD disc. Run SmartRipper,
then click
![]()
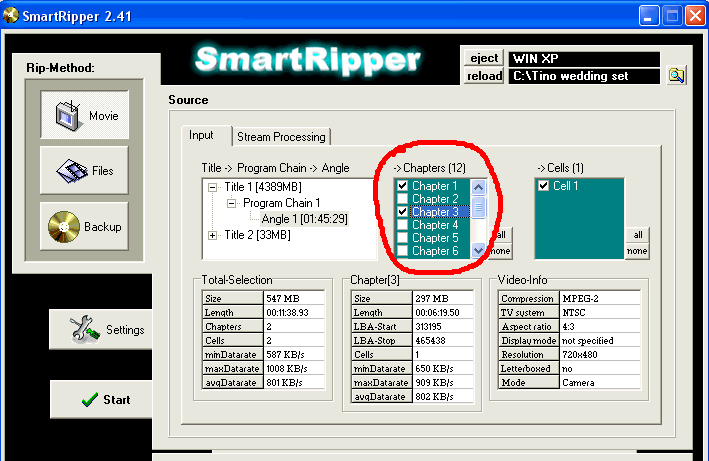
If you have more than one chapters as shown in the Chapters (1) box, then skip to Step #3.
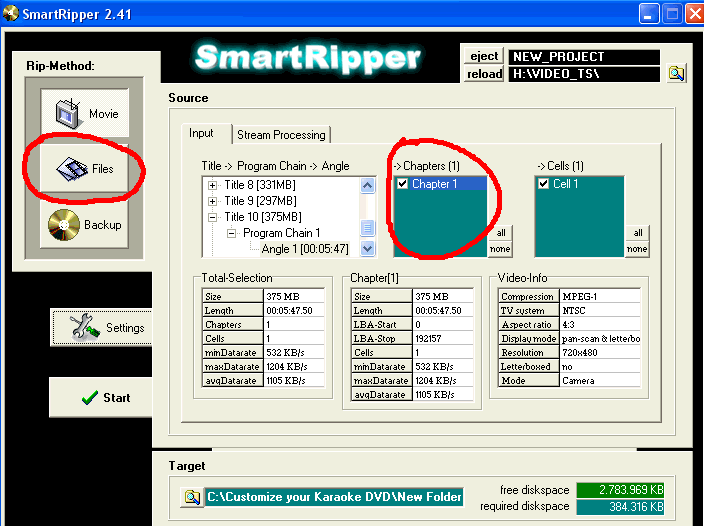
2. Select the song that you like. The song's file size will be greater than 100.000KB. When done, skip to Step #4.
3. For this picture below, Chapter means Song, select the songs (Chapters) you like.
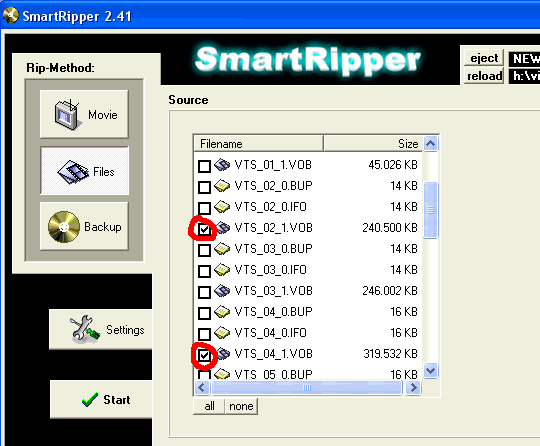
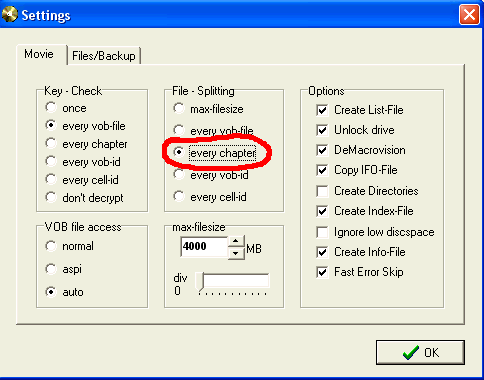
4. Click
![]() . Select every chapter on
File-Splitting column, then click
. Select every chapter on
File-Splitting column, then click
![]()
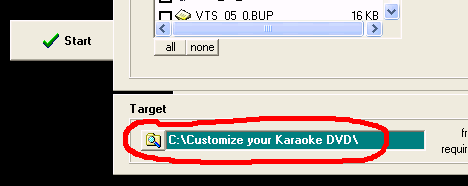
5. Change the Target folder that you want to save your
files. Click
![]()
6. Repeat the same procedure for another song from another Karaoke DVD.
![]()
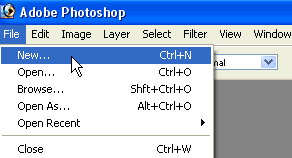
1. Click File/New...
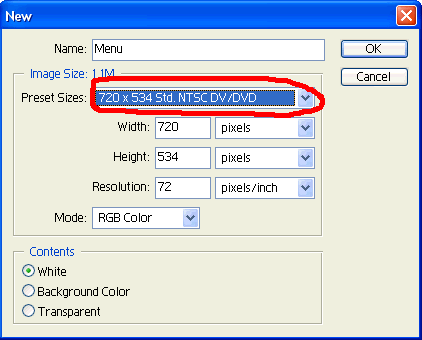
2. Select 720 x 534 Std. NTSC DV/DVD
from Preset Sizes. Type a name, then click
![]()
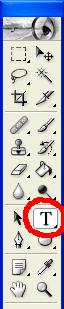
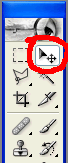
3. Select
![]() from the Toolbox
from the Toolbox
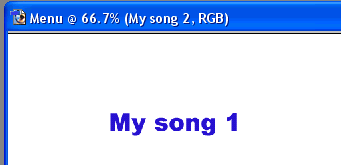
4. Type the name of the song.
Click ![]() from the Toolbox when finish typing.
from the Toolbox when finish typing.
5. Repeat the same procedure for the rest of the song. In this tutorial, I only have 2 songs.
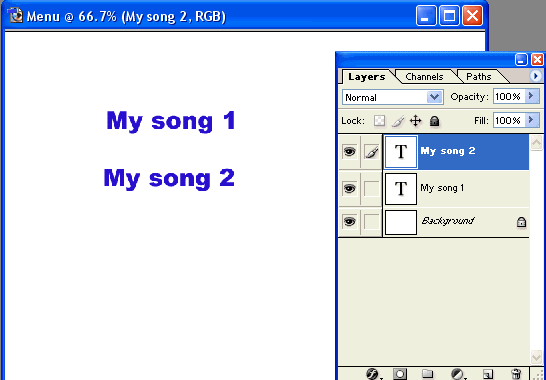
6. Design your background to your like. You can add more
images to your menu. When done you need
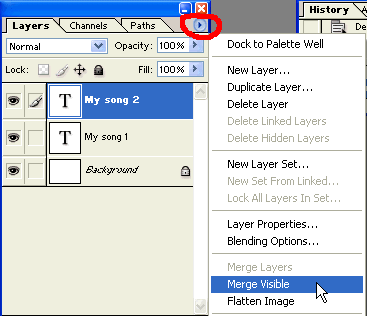
to merge all the layers. On the Layers window, click
![]() and select Merge
Visible
and select Merge
Visible
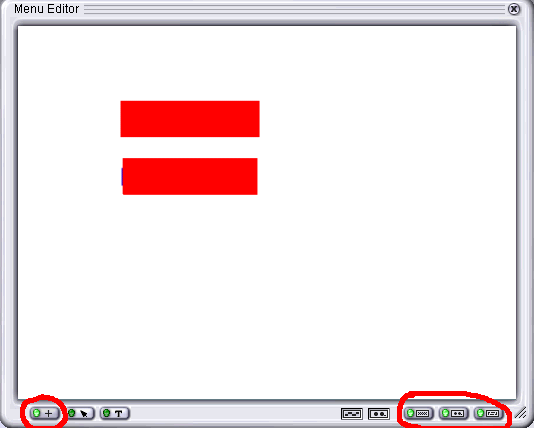
7. Now we need to make the Highlight for the texts. Select
![]() from the ToolBox.
Also select color RED
from the ToolBox.
Also select color RED

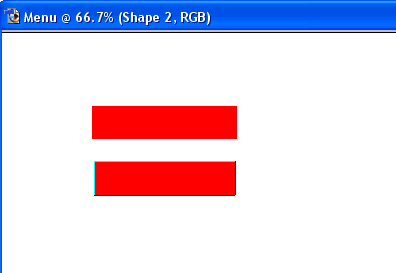
8. Draw a rectangle on top of each text.
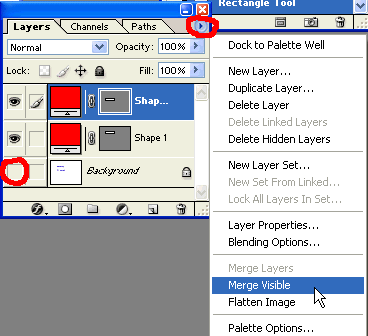
9. Now we need to merge the layers that we just did. Click
![]() to hide the
background layer. Click
to hide the
background layer. Click
![]() , then select
Merge Visible.
, then select
Merge Visible.
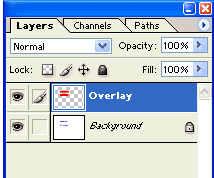
10. Unhide the Background layer by clicking on the box in front of the Background layer.
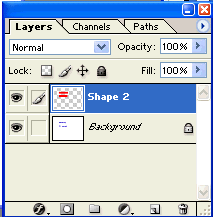
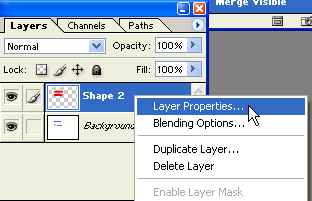
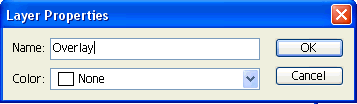
11. For DVD Producer to recognize the menu file, we need to change the layer's name to "Overlay". Right-click the Shape 2 layer, then select Layer Properties...
12. Type: Overlay , then click
![]()
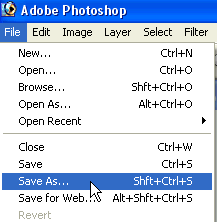
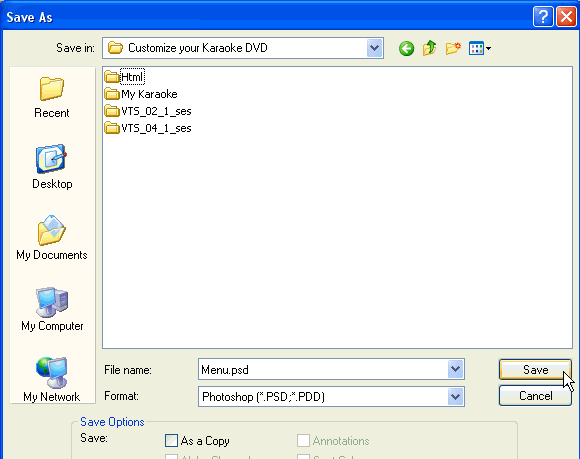
13. The menu is finished. Click File/Save As...
Type a name, then click
![]()
![]()
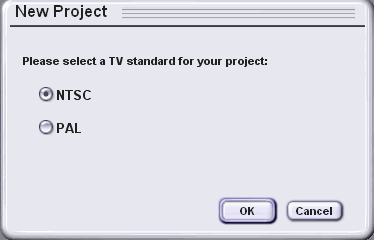
1. Open DVD Producer 3.5. Select Video format, then
click ![]()
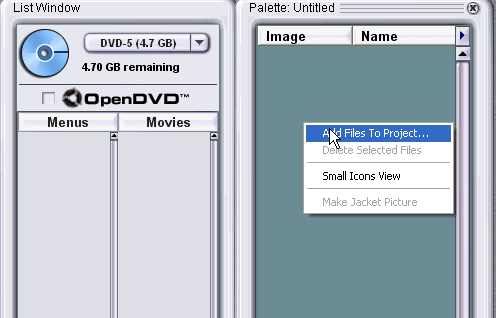
2. On the Palette window, right-clicking, then choose Add Files To Project...
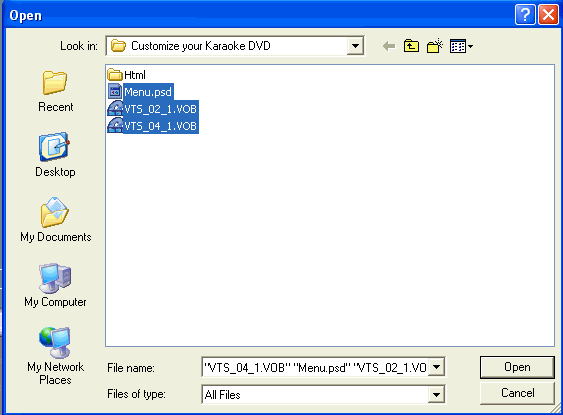
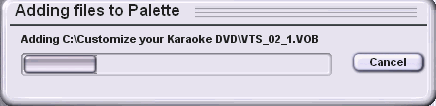
3. Select your songs that you ripped from DVD, and Menu.psd. Click
![]()
This process will take some time to finish.
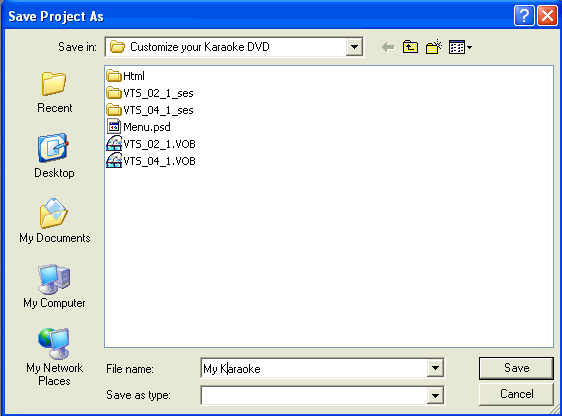
4. You need to save your project. Click File/Save As...
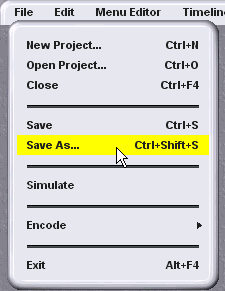
Type a name, then click
![]()
5. Drag Menu.psd from Palette window to Menus window under List Window
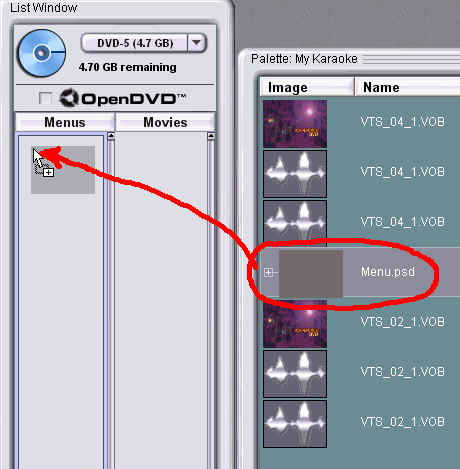
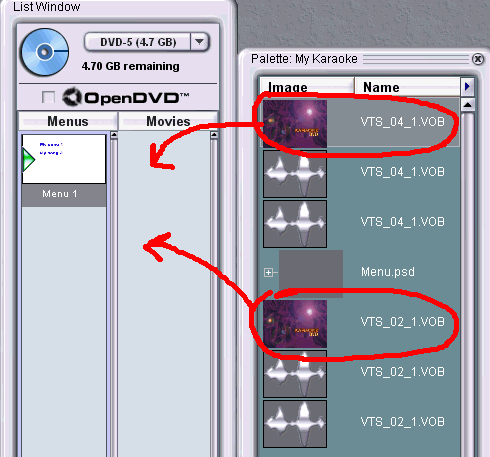
6. Drag the songs to the Movies window.
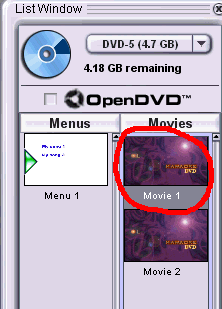
7. Double-clicking Movie 1 (song 1) to display the Timeline window
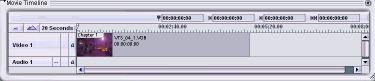
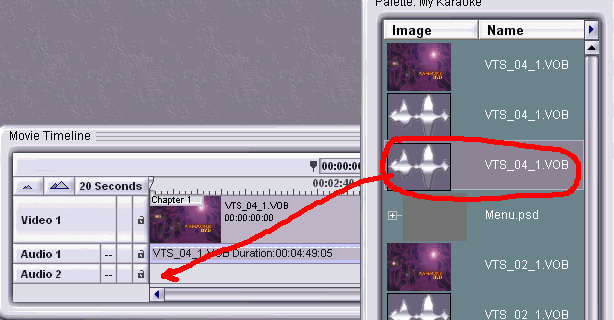
8. Drag VTS_04_1.VOB (audio 1 for song 1) to the Audio 1 track of Movie Timeline.
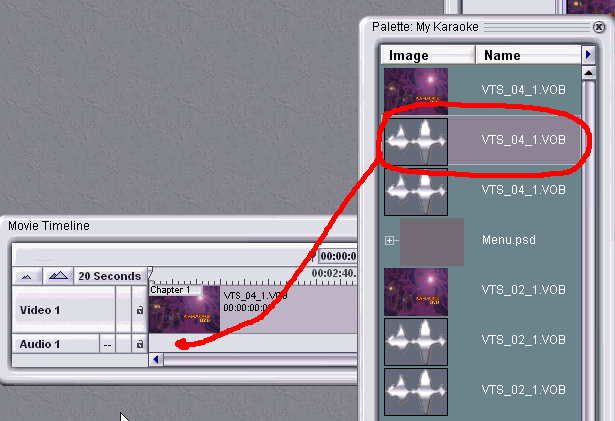
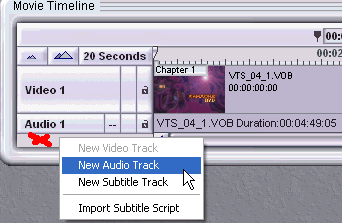
9. We need to add another Audio Track. Right-clicking anywhere under Audio 1 Track, then select New Audio Track.
10. Drag 2nd audio to the Audio 2 Track.
11. Click on Movie 2 (song 2) on the List Window, Movie 2 is selected in the Movie Timeline.
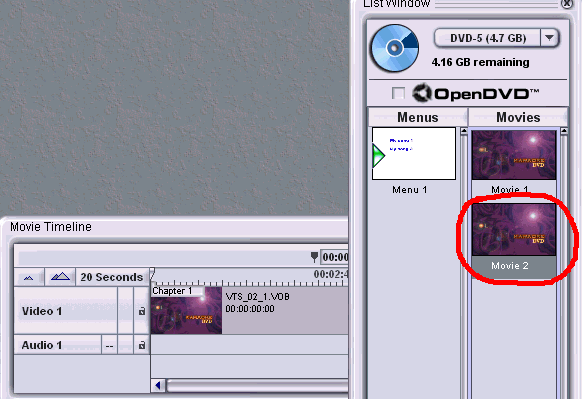
12. Repeat the same procedure to add the 1st and 2nd audio to the Audio 1 Track and Audio 2 Track.

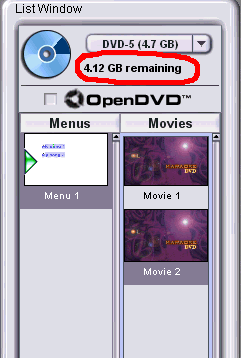
You can tell how much space left by looking on top of the List Window.
13. Now we need to add the link to the menu. Double-clicking the Menu 1 from the List Window
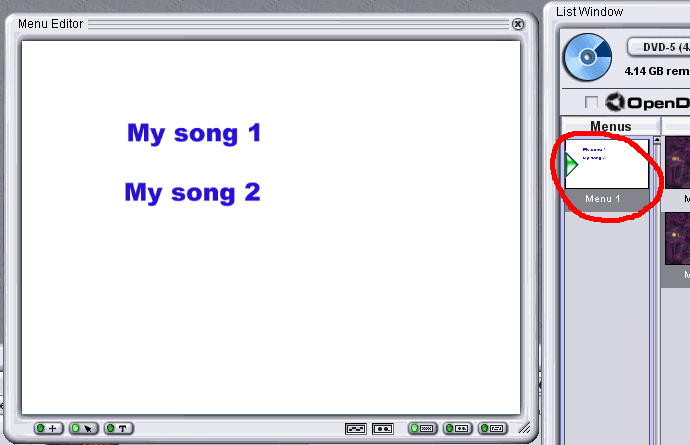
14. Click those button as show below to turn them on by clicking on them.
15. Put cursor as shown below, then start dragging to make a marquee around the RED rectangle.

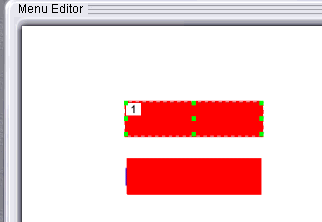
16. Do the same for the 2nd RED rectangle.

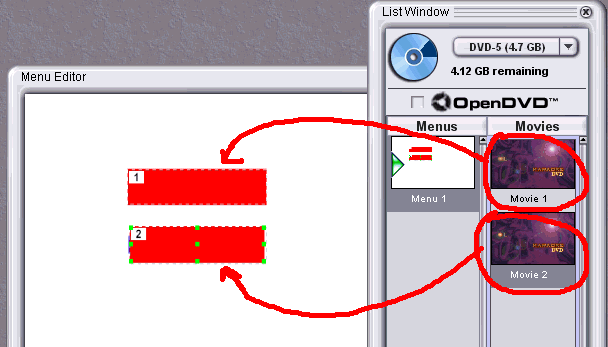
17. Drag Movie 1 to the 1st rectangle. Drag Movie 2 to the 2nd rectangle.
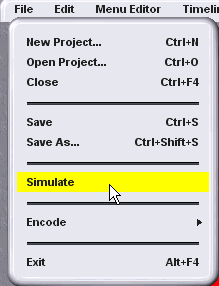
18. Now we need to simulate the project. Click File/Simulate
19. Click on the remote to navigate. Close by
clicking ![]()
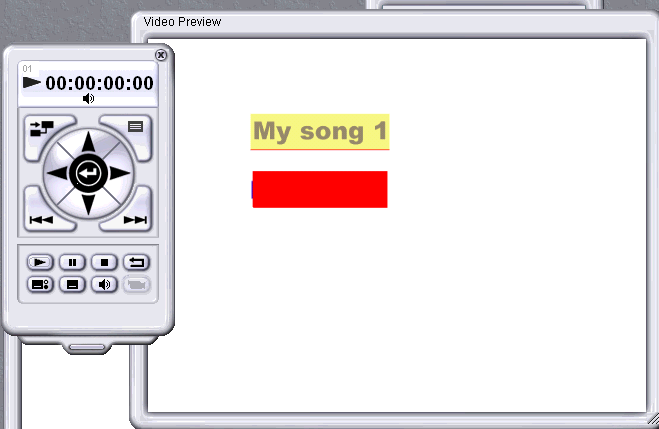
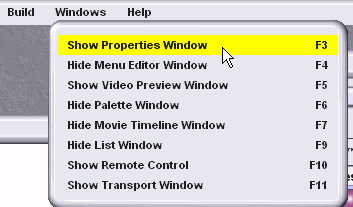
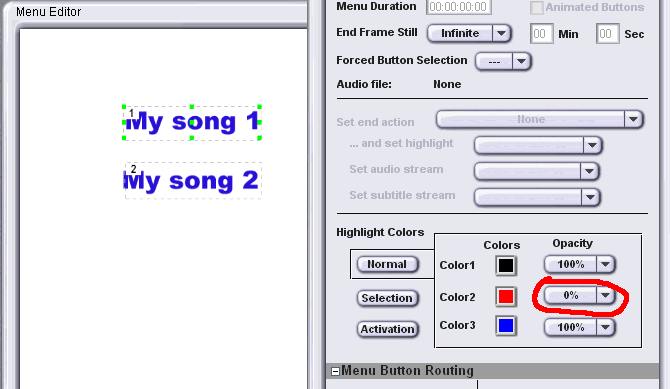
20. As you can see, the red rectangle is blocking the text. So we need make disappear. Click Windows/Show Properties Window
21. As you can see, the Color2 "RED" is 100% Opacity.
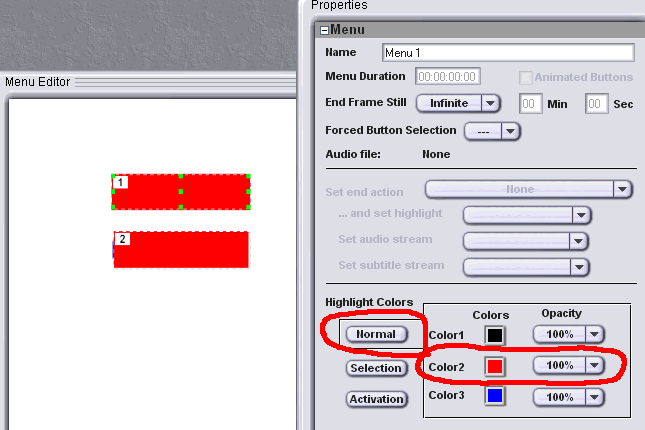
22. Change the opacity to 0%. Now the texts are visible.
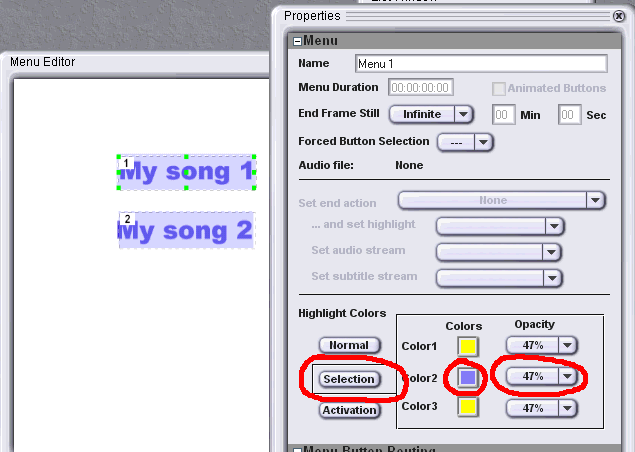
23. Click on the Selection, you can change the color and the level of opacity.
24. Do the simulation to see how it works. At this point, when it finishes playing the 1st song, it will return to the Menu. To make it play the next song after it finishes playing the 1st song, follow the step below.
Make sure My song 1 is still selected on the Menu Editor
window. Click ![]() to expand the Advanced option.
to expand the Advanced option.
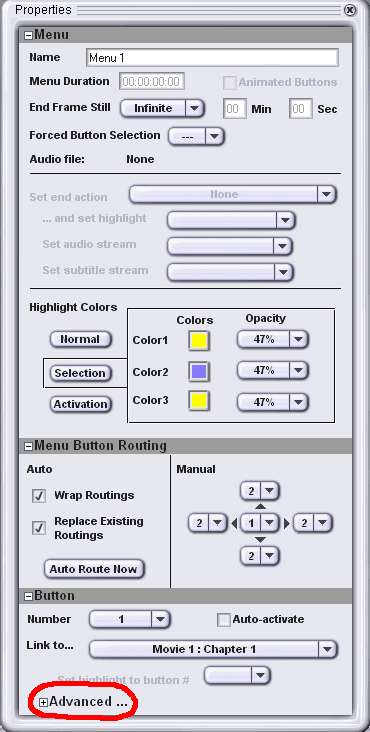
25. Select Replace end action with, then select Movie 2: Chapter 1

26. We leave the 2nd song the same because we want it to return to the menu. If you have more than 2 songs:
2nd song, replace end action with Movie 3: Chapter 1
3rd song, replace end action with Movie 4: Chapter 1
4th song, replace end action with Movie 5: Chapter 1
*
*
*
Leave the last song the same.
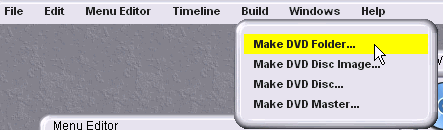
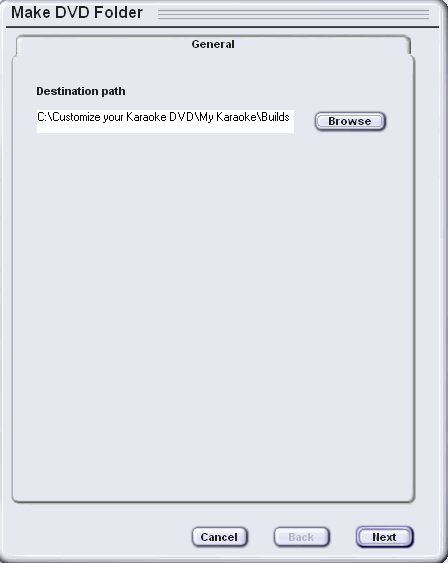
27. Now you are ready to make DVD folder. Click Build/Make DVD Folder...
28. Click
![]()
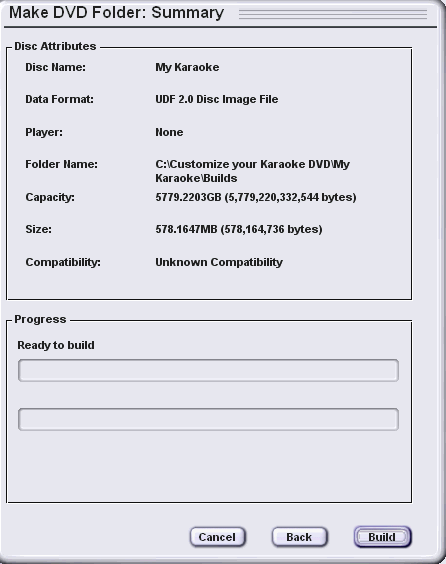
29. Click
![]()
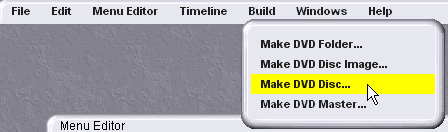
30. You can use DVD Producer or Nero to burn this DVD folder to DVD.
![]()
I. Burn with DVD Producer
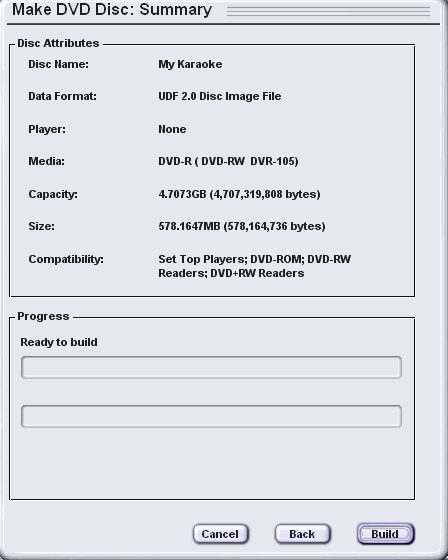
1. Click Build/Make DVD Disc...
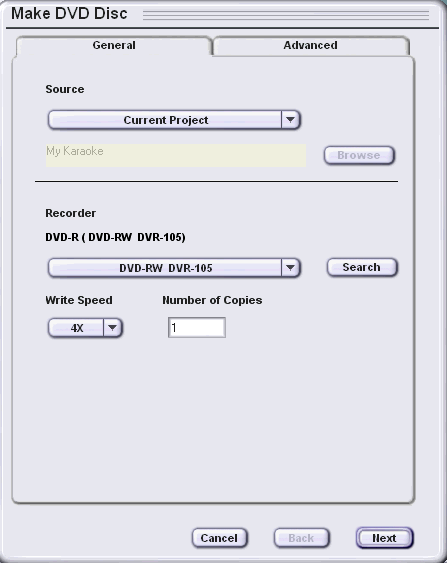
2. Click
![]()
3. Click
![]()
II. Burn with Nero
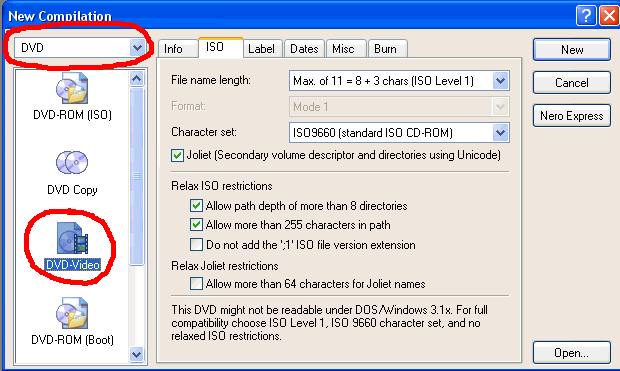
1. Run Nero. Select
DVD mode, then select DVD-Video. Click
![]()
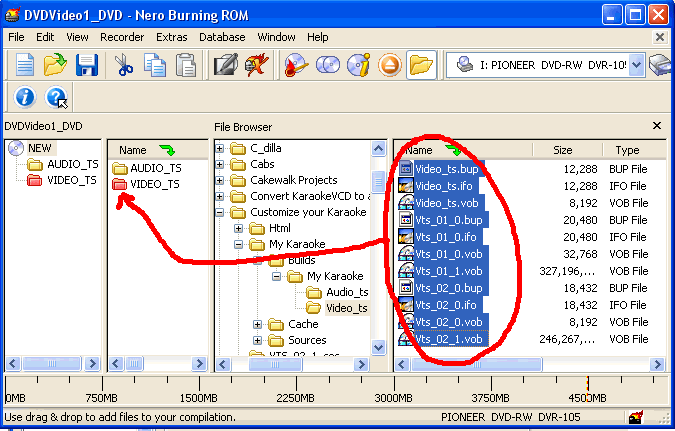
2. Drag all files from the Video_ts folder on the right to the VIDEO_TS folder on the left.
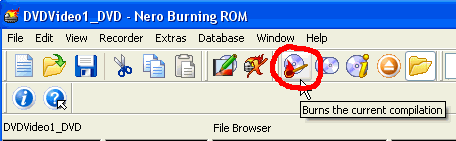
3. Click
![]()
4. Click
![]()
