C. Prepare Lyrics in Substation Alpha
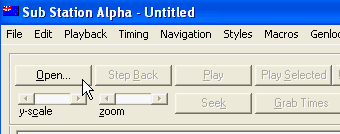
1. Click ![]() to select your Music 8 bit Mono Premiere.wav
to select your Music 8 bit Mono Premiere.wav
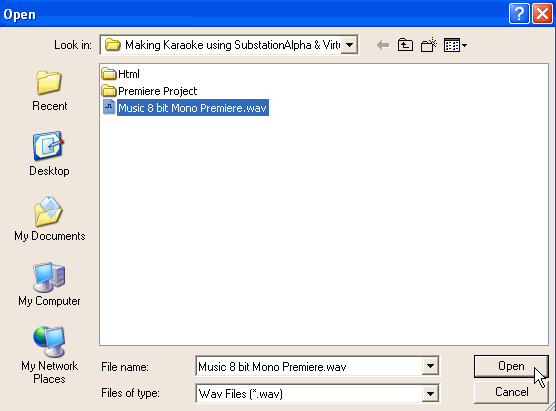
2. Go to Making Karaoke using SubstationAlpha &
VirtualDub folder, then select Music 8 bit Mono Premiere.wav.
Click ![]()
3. If the Waveform is too small for see, then click ![]() to make it larger.
to make it larger.

4. Here are the lyrics for the song:" Yesterday Once More"
When I was young
I'd listen to the radio
Waiting for my favorite songs
When they played I'd sing along
It makes me smile
Click ![]() to switch to Text mode
to switch to Text mode

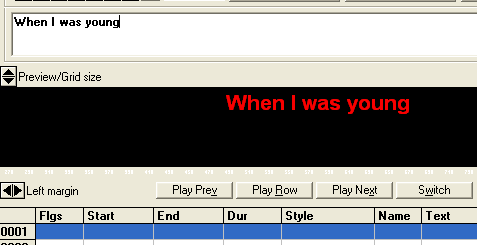
5. Type the first line of lyrics in the text box. As you type, the lyrics will be displayed on the Preview/Grid size windows. Hit Enter key on the Keyboard to accept it.
 .
.
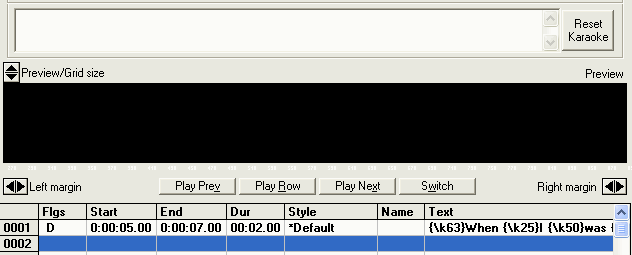
6. After you hit Enter key, you will see the data filled as shown below for line 0001.
7. Now type the 2nd line of lyrics, then on the Style, select 2nd line. Press Enter, and Enter again to accept the change.
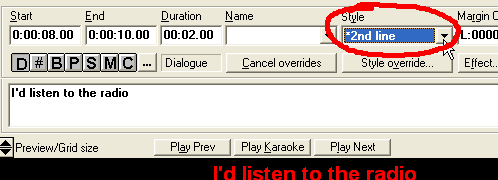
8. Now go on finish typing the rest of the lyrics. After you've finished, you should have the result same as below.

9. Click ![]() to go back to WAV mode. Then click the first
line to select it as shown in below.
to go back to WAV mode. Then click the first
line to select it as shown in below.

10. Click ![]() to play the song. To stop, click
to play the song. To stop, click ![]() again.
again.

As the song plays, try to remember the start and the end point location of the first line of lyrics.
To set the Start point, left click on the waveform. It's yellow line
To set the End point, right click on the waveform. It's red line.
Click ![]() to play the selection from the yellow to the red bar. To stop playing , click
to play the selection from the yellow to the red bar. To stop playing , click
![]()
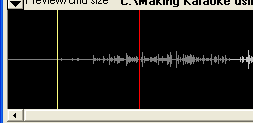
Keep adjusting until you're satisfy with it. The Start point should be about 3 sec before the vocal starts. It's called a Lead Time. This Lead Time will allow the lyrics be on the screen for 3 sec before it starts changing color.
Yours should have something like below.
11. Click ![]() to set the time.
to set the time.
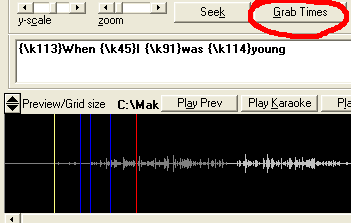
There are four sections that correspond to four words. Each
section tells how long it will play. Right now if you click ![]() ,
you will not hear the first word because the timing is not correct. Click
,
you will not hear the first word because the timing is not correct. Click
![]() to play
the next section or the next word.
to play
the next section or the next word.
12. We have to set the Lead time. Type in another k vaule exactly same as the first one on the left. Then click Space bar to add space.

Then change the second k vaule on the left to zero

13. Now we have to move all the lines between the yellow and red bar to the right for easier to adjust timing
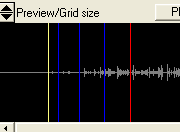
Click k value for the word "was", then use + key on the Numeric keypad to move the blue bar to the right.

As you hit + key on the Numeric keypad, the blue bar will turn to white. Move it the right as show in the picture.
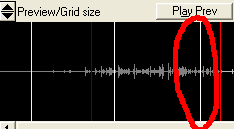
14. Do the same with the word "I" and the "When". After you finish, it should look like below.
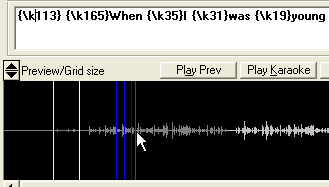
15. Now click the last k value on the far left.

Click ![]() to play the section. What you want to do is get to the point where the vocal
just to start.
to play the section. What you want to do is get to the point where the vocal
just to start.
Hit + key on the Numeric keypad to move to
the right. Click ![]() to verify it. Before you use + or - key again, click on the k
value first. Your result for the Lead Time should be similiar
with the picture below.
to verify it. Before you use + or - key again, click on the k
value first. Your result for the Lead Time should be similiar
with the picture below.
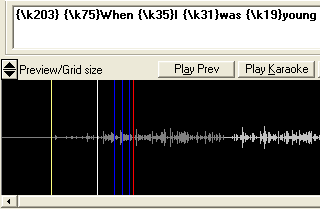
16. Click on the k value for the word "When".
Click ![]() to listen to just the word "When"
to listen to just the word "When"
Use - key on the Numeric keypad to move to the left. Keep doing it until you hear only the word "When"
17. Do the same for the rest of the words. Hit Enter key to accept the change ( This is very important step. If you forget to hit Enter key, then your hard work will be loss forever)
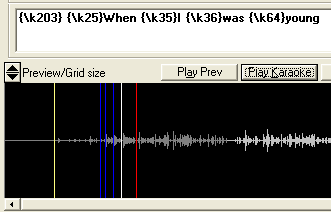
18. Now it's time to test your hard work.
Click on the first line again if it's not already selected.

19. Click on PlayBack, then From Selected Row

Press any key to clear the screen, then press any key again to start previewing. To stop, hit Esc key
Note: Sometime you will hear the audio only when you see the words. If you don't see the words, you will not hear the vocal. This is normal.
20. Now it's time for 2nd line. Click the 2nd line to select it.

21. On the Preview/Grid size window, the Start and End time of the first line is still displaying. We want the 2nd line to start at the same time with the 1st line. So both lines display on the screen. That's where the yellow bar is.
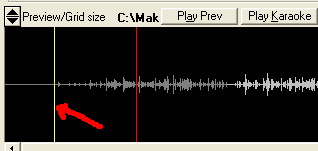
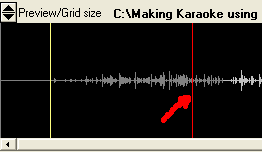
22. We don't do anything with yellow bar because is already set. Now right click anywhere after the original red bar to set a new End time as shown below.
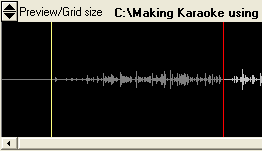
23. Click ![]() to verify if you get whole 1st and 2nd line of words. If not, then right click
further right until you get them all. Yours should be similiar to the picture
below.
to verify if you get whole 1st and 2nd line of words. If not, then right click
further right until you get them all. Yours should be similiar to the picture
below.
24. Click ![]() to get the timing.
to get the timing.
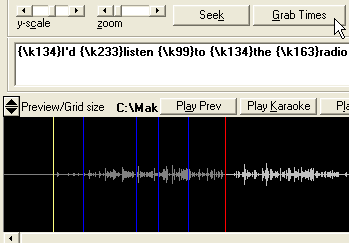
25. Now we will adjust the timing for each word.
First, we need to move all of the blue bars to the right. Click the k value for the word "the", then use + key on the Numeric keypad to move to the right.

Try to get your result close to mine.

26. Now click on k value for the word "to" and use + key to move to the right. Do the same with the rest of the words. Yours result should be similiar as below.
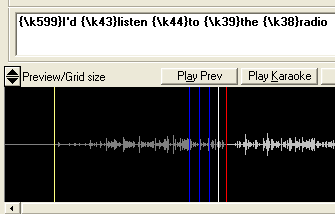
27. We have to add the Lead time. Type in another k vaule exactly same as the first one on the left. Then click Space bar to add space.

Then change the second k vaule on the left to zero

28. To adjust the Lead Time, click on the new added k
value, then click ![]() to play the section. What we want to do is get to the point where the vocal
of the 2nd line just to start.
to play the section. What we want to do is get to the point where the vocal
of the 2nd line just to start. 
Hit - key on the Numeric keypad to move. Click ![]() to verify it. Before you use + or - key again, click on the k
value first. Your result for the Lead Time should be similiar with the picture
below.
to verify it. Before you use + or - key again, click on the k
value first. Your result for the Lead Time should be similiar with the picture
below.
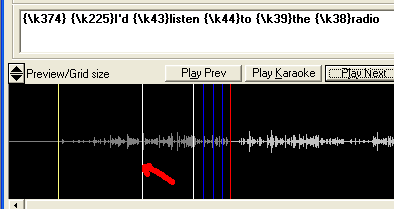
29. Click on the k value for the word "I'd".
Click - key to move to the left. Click ![]() to verify. Do the same for the rest of the words. Your result should be similiar
to the picture below.
to verify. Do the same for the rest of the words. Your result should be similiar
to the picture below.
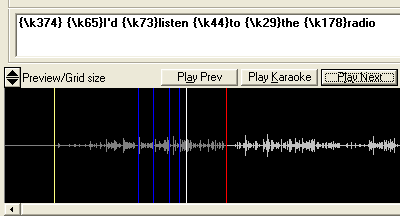
30. Test out your work, hit F9 or click Playback\Play From Start to play from the first line.

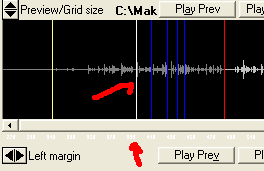
31. Now is time for the 3nd line. We want to display the 3rd
line of lyrics when the 2nd line of lyrics start changing color. Click on
the 2nd line of lyrics to select it, then click ![]() ,
this allows us to see all the sections.. On the waveform, look for the white
bar (The second one from the left), that is where the vocal start for the
2nd line of lyrics. That what we want to set the Start time of the 3rd line
of lyrics. On the bottom of the Preview/Gride size window,
there is a small number.Your job is to remember that number.
,
this allows us to see all the sections.. On the waveform, look for the white
bar (The second one from the left), that is where the vocal start for the
2nd line of lyrics. That what we want to set the Start time of the 3rd line
of lyrics. On the bottom of the Preview/Gride size window,
there is a small number.Your job is to remember that number.
32. Click on the 3rd line to select it.

33. Left click on the waveform where the number that I told you remember it.
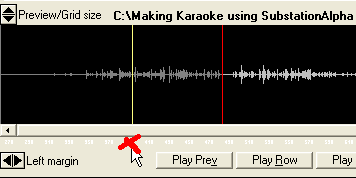
34. Right click on the waveform behine the red bar to set the
End time. Click ![]() to verify if all the words for 2nd and 3rd line are on it. Below is the one
that you should achieve.
to verify if all the words for 2nd and 3rd line are on it. Below is the one
that you should achieve.
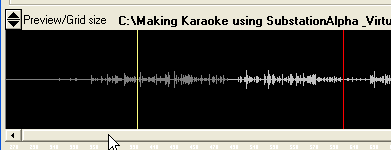
35. The procedure to get the correct timing is the same as in 1st and 2nd line. The finished result is shown below.
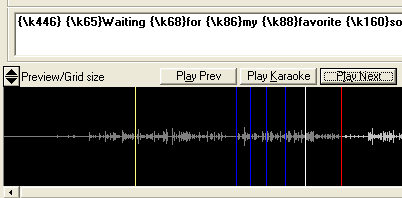
36. We made the first 2 lines(1st and 2nd line) display on the screen at the same time. And we want to have the last 2 lines(4th and 5th line) appear on the screen until the end of the last line.
Click on the 3rd line to select it. Click ![]() to display all the sections.
to display all the sections.

Remember the location of the white bar, that's where we want to the 4th line to start.
37. Click on the 4th line to select it. Then click on the waveform where the white bar used to be. This will set the Start time of the 4th line.

38. The End time of the 4th line should be
at the same for the End Time of the 5th line. Click ![]() to verify if you get all the words on the 4th and 5th line. Right click on
the waveform to set the End time. Your result should be similiar to the picture
below.
to verify if you get all the words on the 4th and 5th line. Right click on
the waveform to set the End time. Your result should be similiar to the picture
below.

39. Click ![]() to get the time.
to get the time.
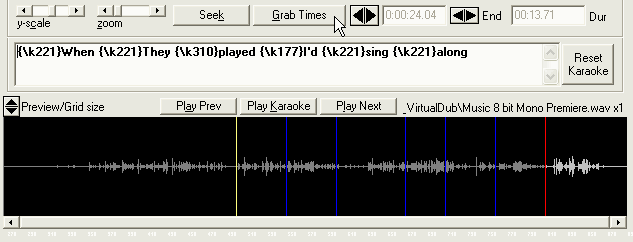
40. Move all the blue bars to the right. The procedure is the same as for the 1st line.

41. Add the new k value with the k value of word "When" , then change it to zero

42. Click on the last k value on the left to set the Lead
Time, then click ![]() to verify where the word "When" starts to sing.
Use - key to move to the left. Your result should the same as below.
to verify where the word "When" starts to sing.
Use - key to move to the left. Your result should the same as below.

43. Do the same for the last of the word of the 4th line.
Here is the finished one for the 4th line.

43.2. Now we need to add the k value for last word "along" so it stays on the screen until the end of the 5th line.
Type in the new added k value with the value of the word "along", then change the k value for the word "along" to zero

43.3. Now click on the k value of the word
"along", then use + key to move to the right. Click
![]() to verify
if get the whole word of "along". Here is the finished
result. The arrow shows the bar where the word "along" ended.
Don't forget to press ENTER key accept
the change whenever you want to move on to do another line..
to verify
if get the whole word of "along". Here is the finished
result. The arrow shows the bar where the word "along" ended.
Don't forget to press ENTER key accept
the change whenever you want to move on to do another line..

43.4 Now do the 5th line. The proceedure is same for the 1st line. Here is the result you should have.

37. Test out your hard work. Press F9 to play from the start.
That's all for this part.